You can either install chain link fence posts by directly driving them into the ground or by digging holes & setting them in concrete, depending on the desired strength. To drive chain link fence posts, you can use a manual or automatic post driver. While to set posts in concrete, we’ve to dig post holes, & use a concrete mixture. Chain link fence posts must be spaced a maximum of 9-10 feet.
Read the complete step-by-step guide below:
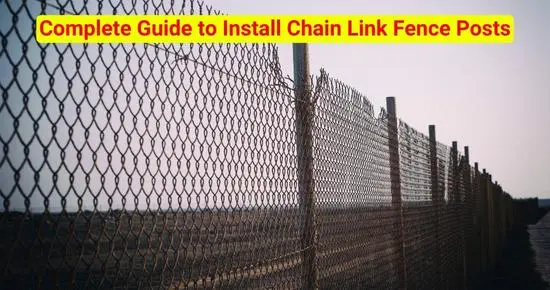
How to install chain link fence posts?
Chain link fence posts can be directly driven in the ground or set in concrete. Whether you should set fence posts in concrete or drive them directly depends on the size of the area you’ve to cover, ground hardness, amount of load(weight) the fence has to bear & the type of project, i.e., commercial, residential, or DIY.
There are three ways to install chain link fence posts:
- Drive chain link fence posts
- Installing corner posts & gate posts in concrete & driving the chain link posts
- Installing all posts in concrete
Option 1: Drive all chain link fence posts
Driving chain link fence posts into the ground is a suitable method for relatively shorter areas and lightweight to medium-duty fencing needs. Directly driving chain link fence posts offer a cost-effective and relatively quick installation process. However, it’s crucial to ensure that the soil is stable enough to hold the posts securely in place over time.
A bit of professional advice is that you can set 3-4 feet of the post or at least 1/3rd of the post underground to prevent the hustle of installing chain link fence posts in concrete. It will still help you keep the posts almost as sturdy as installed in concrete.
For example, if you are installing a DIY chain link fence or in a small area with relatively low expected tension, you can go with driving all the chain link fence posts by setting 3-4(maximum) into the ground.
Option 2: Install all chain link fence posts in concrete
Setting chain link fence posts in concrete is the preferred method for permanent fencing, heavy-duty purposes & challenging ground conditions such as soft ground that does not offer enough stability on its own. It is recommended for locations with heavy usage, such as most residential, commercial, and industrial applications, as the concrete bases enhance the fence’s ability to withstand stress. Whenever the fence posts have to bear a lot of pressure, it’s better to set all fence posts in concrete.
Concrete anchors the posts firmly, ensuring they remain upright even in adverse weather conditions such as high winds. While this method requires more effort and time during installation, it guarantees a robust and long-lasting fence structure.
For example, if you are doing a commercial or residential project in a slightly larger area with a heavy-duty purpose fence, all the chain link fence posts must be set in concrete in such scenarios. It’s because a permanent chain link fence in a commercial or residential area will have to bear a lot of pressure, so it’s better to set all posts in concrete.
Option 3: Setting corner posts & gates posts in concrete while driving the line posts:
It’s recommended to install at least the corner posts & gate posts in concrete, depending on the desired strength, as these posts will have to bear maximum tension. Suppose you are installing a chain link fence in a residential or agricultural area with normal tension & weight-bearing requirements. In that case, you can go with corner & gate posts set in concrete, while the line posts can be directly driven into the ground.
However, setting chain link posts in concrete is not compulsory. For example, if you are building a chain link fence in a residential or non-commercial area that doesn’t have to bear a lot of tension, you can drive fence posts without digging post holes & using concrete. By driving more parts of chain link posts(3 to 4 feet), you can make your fence sturdier and more effective as they are set in concrete.
Tip: Whether directly driving or setting in concrete, set at least 1/3rd of the post underground for greater stability. While installing posts, you must have a level tool to check the balance of the posts, whether you are directly driving the posts or setting them in concrete.
My Experience:
I’ve been installing chain link fences in South Carolina for over five years. For most commercial or heavy large-area coverage projects, I prefer to install all chain link posts in concrete. For the regions prone to strong winds and heavy-duty requirements, the most sturdy option I would suggest is installing all posts in concrete.
However, if the fence doesn’t weigh as much as heavy-duty fences and doesn’t have to bear a lot of tension, such as a short perimeter residential or agricultural fence, my approach to ensure sturdiness while saving the clients budget & my time is by driving 1/3rd(3-4 feet) of the line posts directly & set the corner & terminal posts in concrete. Concrete-set corner and terminal posts provide enough support and prevent the fence from leaning or collapsing. Line posts, being under less tension, can be directly driven into the ground, offering a balance between stability and cost-effectiveness.
However, for large area fencing, a similar way to sturdily install chain link fence is by driving 2 posts & installing the third one in concrete.
I’ve also installed lightweight, short premiere residential & agricultural fences, such as chain link chicken fences by driving all posts upto 3-4 feet directly in ground without concrete & it works perfectly well in both soft or hard ground.
So, whether you should drive the posts or drive them depends on the ground conditions, the length of the area to be covered & the purpose of the fence. In any method you equip, the key for sturdily installing chain link fences is to set as much part of the posts as possible under the ground. A general rule is to drive 1/3rd of the posts under the ground.
Step 1: Chain link fence post spacing:
I personally space chain link fence posts for almost all of my commercial or residential projects, with 9-10 feet between the line posts. You can decrease the post spacing by 10 feet for better strength in your fence but don’t increase it more than 10 feet. However, if the distance between the terminal/gate post & the corner post is greater than 10 feet, divide the length by two & install a line post(centered fence post) at the center.
Generally, it’s better to use thick gauge & large diameter fence posts for corner posts & gates as compared to the line posts. It’s because the corner posts & the gate posts have to bear more tension than the line posts.
Step 2: Draw the fence line & mark spots for installing posts:
Determine the area to be fenced & mark the corners by driving stakes at all the corners. Then, tightly tie a string between all the corner stakes to install fence posts in a straight line.
After that, starting from a corner, mark spots at regular intervals as per the decided spacing between the posts(10 feet optimum). Ground marking spray paint is commonly used to mark spots to install fence posts. As an alternative to spray paint, you can also use chalk, plaster of Paris powder, or small flags to mark spots to install fence posts.
As 1/3rd of the post has to be installed under the ground, mark the part of the chain link fence posts that will go underground. While installation, It’ll help you know how much part of the post has to be installed underground.
Step 3: Gate post installation:
To install a gate between the fence, measure the length of the gate & install the gate posts, leaving the distance plus a couple of inches extra for the hinges. For this purpose, temporarily mount the gate post hardware(hinges) & gate with the gate post to know at how much distance gate posts should be installed.
It’s advisable to use a slightly thicker gauge & larger diameter fence post than the line posts. It’s because the gate post(terminal post) has to bear more tension than the line posts. It’s advisable to install gate posts in concrete.
Method 1: Drive chain link fence posts:
After marking spots for installing chain posts & marking the part of posts that has to be driven into the ground, you’ll need a post-driving tool. For installing a few posts on soft ground, you can use a manual post driver. However, it will take a lot of time & effort. But as the chain link posts have to driven be up to 1/3rd(3-4 feet) of the total length of posts, a manual post driver won’t be helpful in heavy-duty scenarios.
But as per my experience, an automatic(electric) post driver will be ideal for installing more fence posts on medium to hard ground & installing large-diameter posts.
However, if you are using T-posts to install chain link fences, you can use a manual post driver to drive as many posts as you want.
Method 2: Install chain link fence posts in concrete:
Although you can directly drive fence posts into the ground, as the corner posts & gate posts have to bear a lot, Whether you are installing fence posts by digging post holes & using concrete or directly driving them into the ground, for sturdy fencing, 1/3rd of the posts should be installed under the ground.
Step 1: Dig post holes
The first step to installing chain link fence posts in concrete is to dig post holes. The post hole should be deep enough to accommodate 1/3rd of the post length. For example, for an 8 ft post, the post hole should be 30-34 inches deep. Also, the post hole should be three to four times wider than the post’s diameter.
For a short fencing project where you don’t have to install a large number of posts, dig post holes using a manual post-hole digger, a manual auger, or a combination of post-hole digging tools available.
However, If the ground is hard or for digging more post holes, it’s better to use an auger drill. You’ll need a heavy-duty auger drill with a bit according to the required post-hole size.
After digging the post hole, it’s time to make a concrete mixture.
Step 2: Make a concrete mixture
Mix concrete in a wheelbarrow or mixing tray. Here is the ratio of the concrete mixture I make & most of the professionals recommend:
- 1 part cement
- Two parts sand
- Three parts gravel (or crushed stone)
You can measure the mixture with any bucket you are using. Take one bucket of cement, two buckets of sand & 3 buckets of gravel.
However, if you are using fast-setting concrete, most companies, such as Quikrete, already contain a sand cement & gravel blend, so you just have to mix water & don’t have to make the complete mixture.
Step 3: Regular Concrete Vs. Fast setting concrete: which is right for your fencing project
The main difference between both types of concrete is the Fast-setting concrete mixture set in an hour or two. While regular concrete will take a couple of days to completely dry & allow you to continue further. In terms of strength, both fast-setting concrete & standard concrete mixtures have almost the same strength.
Regular concrete costs slightly less than fast-setting concrete; it is ideal for large projects if you want to save some budget. However, quick-setting concrete is ideal if you have to quickly complete the project as it sets within an hour.
Fast-setting concrete requires you to quickly utilize the mixture & set your posts as the mixture dries quickly. However, normal concrete gives more time for installation.
If the weather is cloudy & there is less sunlight, the normal concrete mixture will take more time than normal, so it’s better to use fast-setting concrete.
Step 4: Making the right concrete mixture concentration
Achieving the ideal concrete mixture concentration is essential for the strength and longevity of your fencing project. Start with a water-to-cement ratio of about 0.5 to 0.6, meaning half to 60% of the amount of water compared to the concrete mixture.
Check the consistency; it should resemble thick oatmeal or peanut butter, which should be wet enough to mix well but not overly runny.
Perform a clump test by squeezing a handful of the concrete mixture; it should hold its shape without excessive water seepage.
Look for a surface texture that forms and maintains a ridges-type shape when moved with a shovel or trowel.
Be cautious not to add too much water, as excessive water weakens the strength of concrete. I would suggest you have some dry mixture to adjust the thickness of the concrete mix.
- Fill the hole with concrete mixture & install posts.
- Pour it inside the post hole & fill it up to a few inches below the ground level.
- Insert the post inside the mixture in the hole.
- Shake the post & push it downward so that it reaches the base.
- Keep the post aligned with the string so that it stays in a straight line.
- Use your level tool to check if the posts are straight. If the post is inclining, push it in the right direction.
- Similarly, install all fence posts.
Conclusion
For installing chain link fence posts for commercial & heavy-duty projects, the right way to install all fence posts in concrete. However, in order to balance between sturdiness & save time & budget, you can go with corner & gate posts set in concrete, while the line posts can be directly driven into the ground. For light-duty or medium-weight fixtures, you can go with driving 1/3rd (3-4 feet) of the posts.
If you still need any guidance, ask us in the comments below.