If you have the right hinges for your type of gate and post, the necessary tools, and know how to use them, hanging a gate is fairly simple. For DIY projects, pipe gate hinges work well with round metal posts or gates. For wooden posts, you’ll need hinges that attach with screws. If the gate is heavy, use at least 2 or 3 hinges. Each hinge set includes a pair of male and female hinges.
In this guide, we’ll show you how to choose the right hinges and hang a gate on a round post.
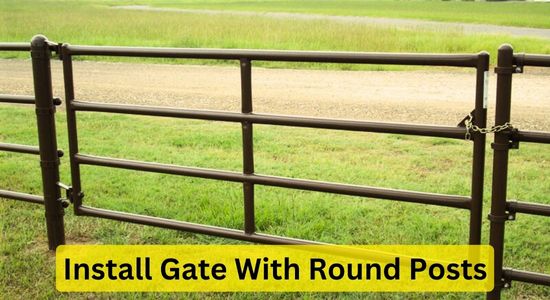
How to Hang a Gate on a Round Post
- To hang a gate on a round post, select the right size gate and round/pipe hinges for the post diameter.
- Mark the gate post locations based on the gate width, and install the posts at least 2-3 feet deep, ensuring they are straight and secure.
- Attach the hinges to the gate and posts. Hook the male and female hinges together, adjusting for proper fit, and tighten all bolts.
- Install a latch on the opposite post.
- Finally, ensure the gate swings smoothly and apply a protective sealant to exposed surfaces.
Step 1: Gather Tools and Materials:
- Select a gate that fits your opening and matches your fence design.
- Get the correct size hinges for your gate and round post.
- You’ll need a spirit level, wrenches or a spanner to tighten bolts.
- Tip: Ensure the gate height matches your fence.
Step 2: Choose the Right Hinges:
Pipe/chain link post hinges are ideal for round metal posts or gates. They are available in various sizes at hardware stores. These hinges are versatile, suitable for metal or wooden gates, and can even attach to concrete walls.

Step 3: Install Gate Posts
- Mark the spots for your gate posts. Ensure there’s enough width for the gate.
- Measure the gate’s width to determine where the second post goes.
- Temporarily position the gate to confirm the spots.
- For round metal posts, use a post-driving tool or set them in concrete. Ensure they are at least 2 feet deep and level.
Step 4: Attach Hinges to the Gate and Post:
- With a friend, position the gate at the desired height, using bricks to keep it off the ground.
- Unscrew the hinge bolts, slide the hinges onto the gate, and reinsert the bolts.
- Install the hinges evenly along the gate. Align the hinges on the post slightly lower than those on the gate.
- Ensure the hinge pins face each other.
Step 5: Connect and Secure Hinges:
- Adjust the hinges before fully tightening to ensure proper alignment.
- Slide washers over the hinge hooks to reduce friction.
- Hook the gate hinges onto the post hinges. Tighten all screws and bolts securely.
- Swing the gate open and close to check for smooth operation. Use a level to ensure the gate is straight.
Step 6: Install Latches:
Attach latches to the opposite post at the center. Follow the manufacturer’s instructions. Finish: Protect any exposed wood or metal with paint or sealant.
Conclusion
Hanging a gate on a round post is a straightforward DIY project with the right tools and hinges. Pipe gate hinges are ideal for round metal posts due to their easy installation and availability in various sizes. Ensure you select the right hinges for your gate and post material, mark and install the posts correctly, and securely attach and adjust the hinges for smooth operation. Adding latches enhances security. Following these steps will result in a functional and aesthetically pleasing gate.
If you need further guidance, feel free to ask in the comments below.
Related posts: