Chicken wire is commonly used to keep chickens & small animals inside the enclosure. Chicken wire is made of thin wires that result in sagging, making the fixture ineffective. For sturdy fencing, the chicken wire must be installed stretched.
This post discusses all DIY tips to install chicken wire tight.
How to install chicken wire tight?
If you are attaching chicken wire to wooden posts, start from the top of the corner post. Keep the fence stretched from top to bottom & hook it to the fence post.
To attach chicken wire to metal posts, wrap the fence around the first post and secure it with zip ties or pieces of metal wire.
To keep the chicken fence tight, maintain the pattern of boxes vertically aligned and hook the fence at regular intervals (6-12 inches). Similarly, stretch the fence horizontally to the next post using a screwdriver or a fence stretcher.
To prevent the fence from sagging, you can install metal wire between corner posts tightly at the top, bottom, or center & tie the chicken wire to it regularly using zip ties.
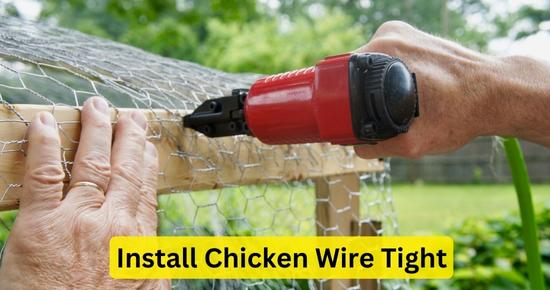
For wood posts, use fence staples to hook the chicken fence. For metal posts, use zip ties to tie the chicken wire fence.
Follow the step-by-step guide below:
Tools required:
- Fence staple gun for wood posts.
- Zip ties or metal wire pieces for metal posts
- Screwdriver or any fence stretcher
- Metal wire to support the fence
Make sure to wear safety gloves.
Steps to install chicken wire tight on metal posts:
To keep the fence straight, mark the posts for the fence top. Start from the corner post & wrap the chicken wire tightly around it. Keep the fence aligned up straight(stretched) from top to bottom. Maintain the same pattern of boxes from top to bottom.
Either use zip ties or cut pieces of metal wire to tie the chicken fence to posts at small intervals(6-12 inches). For stretching, having someone for assistance while you tie the fence to the posts is helpful.
After the fence is attached to one post, we’ll head to the next post & stretch the fence horizontally. For this purpose, you can either pull the fence with your hands or a fence stretcher. While tying the fence to posts, keep the pattern of boxes from top to bottom. For this purpose, leverage the fence using a screwdriver along the fence post.
To prevent the fence from sagging, tie a metal wire tightly between the corner posts at the top, bottom & center, & tie the chicken wire to it.
For tight & long-term fencing, it’s better to use a thicker wire fence, such as a half-inch galvanized wire cloth or hardware cloth, instead of one-inch chicken wire, which tends to disintegrate quickly.
You can also use a wire puller, such as a 2×4 fence stretcher, to stretch the wire fence.
Ratchet straps can also help pull one-inch chicken wire.
Install chicken wire tightly on wood posts:
Roll out the chicken wire fence and staple/tie it to the top of the first corner post. Pull the fence downward and continue attaching it to the post, ensuring that the fence is straight & the same pattern is followed from top to bottom.
Now roll out the fence to the next post. Stretch the fence horizontally using a flat blade screwdriver and attach it from top to bottom with fence staples(fence staple gun). Similarly, attach the chicken wire to all the posts.
To keep the fence from sagging & offer maximum stability, we’ll tie metal wire tightly between the corner posts and tie the fence to it.
For this purpose, mark the posts at the same heights for the top & bottom of the fence. Tightly tie a metal wire between the corner posts at the marked heights. Also, tie the metal wire to other posts to keep the fence in place.
At last, tie the chicken wire to the metal wires at regular intervals using zip ties or pieces of metal wire. Tighten the zip tie and cut off any excess.
Attach chicken wire tightly to the wood frames:
To keep the fence stretched first step is to cut the fence vertically & horizontally straight. Start from the upper corner of the frame. Staple the chicken wire to the top end, keeping it straight.
As you continue from one end to the other, pull the fence tightly & attach it to the frame. Ask someone to keep the fence straight & stretch. Use staples to secure the chicken wire to the wood.
Leave the sides of the chicken wire for now and focus on the bottom portion. Pull the chicken wire down as hard as possible at the bottom.
Staple it to the bottom corner & continue toward the other end. Keep stretching the fence horizontally & vertically. You can also stretch the fence by inserting a screwdriver through the wire fence and leveraging (tilting) it along the side of the frame/post.
Tensioning the fence diagonally while installing makes it tighter. Also, drive screws diagonally into the frame along washers to make the fence stretched & tightly hooked towards the frame.
If you’ve cut the fence wrong from any side, attach the other sides first & then attach that side.
To prevent sagging & keep the fence stretched, twist(overlap) the wires of the chicken wire on each other over the frame & fix it in place by driving screws along the washer.
Additionally, you can install wooden board/sticks diagonally in the frame & attach the fence to it for a more sturdy & tight fixture.
Trim off any excess chicken wire using wire cutters or pliers, leaving a neat edge.
If you don’t have anyone to stretch & hold the fence, start from a corner of the frame and attach the fence using fence staples. Then pull it tightly and attach it to the opposite end. In this way, attach the chicken fence to all corners of the fence. Finally, go through the middle section of the wire.
For additional safety: If you make a chicken coop to keep praying animals like raccoons out, reinforce the bottom portion by covering it with boards. This will make it nearly impossible for animals to remove the chicken wire.
Frequently Asked Questions
How to attach chicken wire to wood?
Conclusion:
I’ve personally applied all the methods above, and all work well. However, remember that thick chicken wire is easy to keep tight.
The main step is to keep the fence straight & stretched at every point during installation.
Follow all the steps explained in the guide & lastly, you must install metal wire between corner posts & tie the chicken wire to it for a sturdy fence fixture.
Hopefully, this guide is helpful for you. However, if you still need guidance, ask us in the comments below.