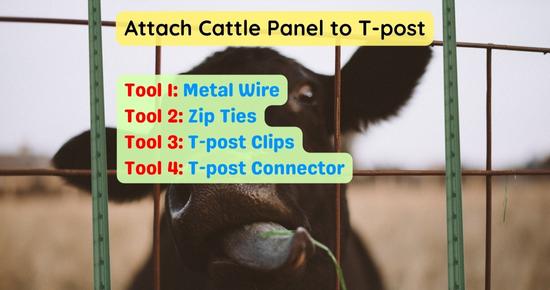
There are several tools that can be used to attach cattle panels sturdily to the T-posts. Zip ties, metal wire pieces, T-post clips and T-post to cattle panel adapters are most commonly used for installing cattle panels with T-posts. All these tools cost differently & serve accordingly.
We’ll discuss a step-by-step guide to installing & attaching cattle panels to T-posts.
How to attach cattle panel to T-post?
Drive 1/3rd of T-posts at regular intervals of 6-10 feet, depending on the weight of the fence, animal loads & ground harness. Install them facing the same direction.
Starting from a corner post, unroll the cattle panel along the T-post line. Attach the top of the cattle panel first to prevent the fence from falling. Keep the bottom of the cattle panel touching the ground. At regular intervals (1-1.5 feet), attach the cattle panel to T-posts.
You can use heavy-duty zip ties, pieces of hard metal wires, T-post clips & T-post connectors to attach cattle panels to T-posts.
- A pack of 100 zip ties costs around 7-12$.
- 100 feet of metal wire costs around 8-10$.
- A pack of 100 T-post clips also costs around 10-15$.
- T-post connectors are removable & longest lasting. However, they cost 2-4$ per piece.
All these tools are long-lasting & ideal for installing DIY cattle panel fences alone.
Below, we’ll discuss all methods and tools & suggest you the right one as per your requirements.
First, install T-posts:
Mark the spots in the fence line at regular intervals to install T-posts. Place the T-post in the desired location in the fence line. Drive T-posts at regular intervals of 6-10 feet. Position all T-posts in the same direction. As per the rules, drive 1/3rd of the T-posts for better stability.
To drive T-posts, use a manual or electric post driver, a heavy metal pipe closed from an end, or a tractor. Keep the T-posts straight while driving them. Use a Level tool to keep the posts straight. Make sure the T-post is firmly driven in the ground.
Tool 1: Zip Ties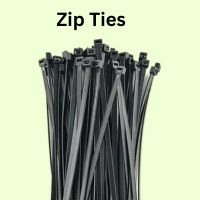
Zip ties can also be a cost-effective option to attach cattle panels & hog panels to T-posts. They easily last at least a year. You can also use zip ties to connect cattle panels together.
Buy high-quality 8 or 12-inch long & .3-inch wide, UV-resistant zip ties to prevent degradation & long-lasting results. If there are heavy winds in your area, use two zip ties at each spot to make the joint bear more pressure.
Tool 2: Metal wire pieces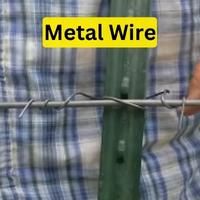
As per my experience, this is the least costly & most effective DIY method to attach cattle panels & wire fences to T-posts.
Tips for using metal wire to attach cattle panels to T-posts:
- Use a hard metal wire of 10-14 gauge to attach the cattle panels to T-posts. Cut 10-inch pieces of metal wire.
- Bend the wire & wrap it around the T-post at the desired height.
- Twist the ends of the metal wire piece multiple times (4-5) around the nearest horizontal wire of cattle panels at both ends of the T-post.
- Similarly, use 3-5 pieces of wires to attach the cattle panel at regular intervals on each T-posts.
- If desired, use fencing pliers to trim off the excess wire and dress down the ends for safety & cleaner appearance.
Tool 3: T-post clips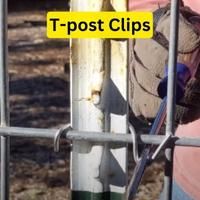
T-post clips are most commonly used to attach wire fences or cattle panels to T-posts. Buy heavy-duty galvanized T-post clips for long-term results.
Price: A pack of 100 costs around 15$.
- Take the T-post clip and wrap the V/U shape around the T-post at the desired height.
- Catch the nearest cattle panel horizontal wire in the hooks(ends) of T-post clips.
- Use a plier, screwdriver, or clip bender to completely twist the ends of T-post clips around the cattle panel wire.
- Once the clip is in position, take a screwdriver & insert it into the eye hook end of the T-post clip.
- Apply pressure and bend the clip’s hooks around the cattle panel wire.
- You can also use a clip bender or plier to bend/twist the hooks of the T-post clip around the cattle panel wire.
- Join the cattle panel at regular intervals of 1-1.5 feet. Make 3-5 joints at regular intervals on each T-post. Repeat the above steps at each T-post.
Tips: After attaching all the T-post clips, check the stability of the cattle panel. Ensure there is no wobbling or movement and that the panel is firmly attached to the T-post.
Periodically check the T-post clips and the overall condition of the cattle panel trellis. Ensure the clips are tight and there are no signs of damage or wear.
Tool 4: T-post connectors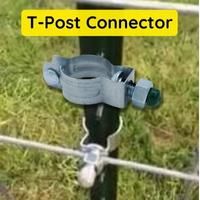
T-post connectors or cattle panel connectors are simple metal brackets specifically designed to fit over T-posts. The split bolts attached on the other end hold the cattle panel wire. These connectors offer flexibility as they can be used with cattle panels, hog panels, chain links & heavy wire fences.
Cattle panel connectors are easily removable & can be reused. It makes them cost-effective, especially for temporary fences or rotational grazing setups.
Opt for zinc-coated or galvanized steel connectors to protect them from rust and corrosion, making them suitable for outdoor use and ensuring long-term reliability.
Price: The connectors are sold individually or in packs at a price of $2-$4 per piece.
Steps to Install:
- Unscrew the bolt of the T-post connector. Slide the connector over the T-post & take it at the desired height. Take it near a horizontal cattle panel wire. Unscrew the split bolt and insert the cattle panel horizontal wire. Then screw the bolt to fix the connector in place.
- Now unscrew the split bolt. Insert the nearest wire of the cattle panel into the split bolt & screw the split bolt.
- Use bolt caps to prevent animals from getting injured.
Frequently Asked Questions
How do you attach cattle panels to wood posts?
Wood post cattle panel connectors are a great DIY tool to attach cattle panels to wood posts. The connector first gets attached to the wood post by screwing nails. Then, the cattle panel is locked in the split bolt of the connector. As a more cost-effective option, you can also use barbed fence staples & fence wire clamps.
How do you attach cattle panels together?
Cattle panels are available in 8 to 20-foot lengths, so you’ll need to attach cattle panels at multiple points in your fence.
- Align the ends of cattle panels together & firmly hold the attachment point.
- Take a 10-inch piece of hard metal wire & twist it around the ending vertical bars(wires) of both cattle panels.
- Use a plier to bend the sharp edges of metal wire.
- Similarly, attach cattle panels at 1-foot intervals.
How to attach hog panels to T-posts?
To attach hog panels to T-posts, you can use zip ties, pieces of hard metal wire, T-post connectors, or T-post clips. Use them at regular intervals of 1-1.5 feet on each T-post, so there would be 3-5 attachment points(joints) on each T-post.
Conclusion
So you can use any of these tools: zip ties, metal wire pieces, T-post clips, or T-post connectors. Make sure that the tool you are using is made for heavy-duty purposes. All these tools can serve you for years. Some fence supply stores may offer you zips or attachment wires free with T-post & cattle panels.
Keep the cattle panels touching the ground. Keep the fence straight & stretched. Start from the top of the T-post, attach the cattle panel at every foot & continue downward. At least trim any excessive wires to prevent animals from injuries.
For further queries, ask us in the comments below.
Hello there, just became aware of your blog through Google, and found that it’s really informative.
I’m going to watch out for brussels. I will be grateful if you continue this in future.
Many people will be benefited from your writing. Cheers!