There is no hard and fast rule to end an electric fence. Fence wires usually start and end at the same corner posts unless you’ve installed fence gates in between the enclosure.
Ending an electric fence is easy if you choose the right end post insulator according to the post type, fence wire’s weight, and the animal’s load.
First, we’ll install ending/corner post insulators. Then we’ll tie the fence wires at corner posts using crimping sleeves or making termination knots.
An electric fence termination knot is the best DIY and cost-saving technique to end/terminate fence wires. It ensures a secure joint between hard metal wires without requiring any tools.
In this post, we’ll discuss everything about ending an electric fence.
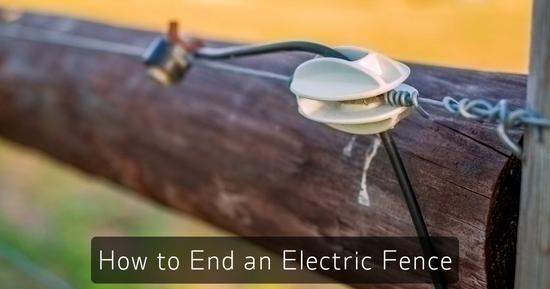
How to End an Electric Fence?
- We will begin by installing the end post insulators. Insert a 4 feet wire through the post insulator’s hole. Wrap the wire around the fence post and knot(tie) the ends using crimp sleeves or making a termination knot.
- Next, pass the fence wire’s end through the other hole/channel on the insulator. Pull the wire to make the fence tight. Tightly Knot the wire back to the fence again, using crimp sleeves or making a termination knot.
- After the fence wire is tied through the post insulator, wrap the extra wire tightly around the fence wire few times. At last, cut off the extra wire to prevent short circuits caused by loosly hanging wire.
- To end a poly wire electric fence, pass the wire’s end through insulator make the fence wire tight & knot the wire back to the insulator. At last burn the end of leftout wire after making knot & tie it to the fence wire. Burning the polywire will expose the filaments, ensuring better current conductivity in the fence wire.
- Crimping sleeves are ideal for a smooth joint between fence wires. However, making a termination knot is a free and easy DIY trick.
Remember: If you only twist the wire’s end back at the fence after passing through the insulator & don’t make a sturdy knot(joint). Such joints get loose with time due to the animal’s load.
Step 1. Choose the suitable corner/end post insulators:
End post insulators terminate(end) the fence wire and hang(tie) it to the fence post. It also prevents fence wires from shorting out at fence posts. You can also use end post insulators to tighten or lose the fence wires.
End post insulators are available in different styles. So choose the quality according to the post type, the fence wire’s hardness, and the animal’s load.
Below we’ll suggest some best corner/ending insulators for different post types.
- Wrap-around post insulator:
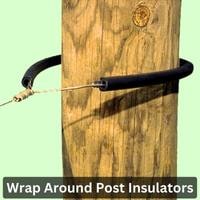
Wrap-around post insulators or tube insulators are flexible, easy to install, and cheap. They are mainly used to end metal fence wires at wood posts.
Steps:
- Simply pass the fence wire through the insulator tube.
- Adjust the tube around the post.
- Make the fence wire tight and knot the fence wire’s end back to the fence wire.
- Screw-in corner post insulators:
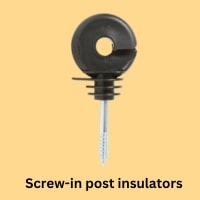
Screw-in corner post insulators, i.e., ring post insulators, are mainly used to install poly wire fences on wood posts.
Screw-in post insulators are installed using a drill chuck(adapter). Then tie the fence wire to the insulator’s ring shape body.
- Corner Knob Insulators:
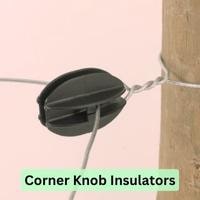
A corner knob insulator, i.e., BW-KK-10 or any double u-channel post insulator, is ideal for:
- Terminating(tying off) metal and poly wire fences.
- Can be installed on any type of post.
Corner knob insulators have two holes(channels). One attaches the insulators to the fence post. The second hole is used to terminate fence wires.
- Donut Insulator:
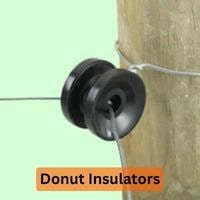
Donut insulators are heavy-duty insulators commonly used to terminate hard metal wires. They can be installed on any sturdy fence post i.e. wood or t-posts.
Donut insulators also have two channels(holes), one for tying insulators to the post and the other for tying off fence wires.
Now we’ll discuss how to install end post insulators.
Step 2. Install the end post Insulators:
Take a 3-4 feet piece of hard metal wire and pass it through the hole in the insulator.
Wrap the wire around the fence post and decide how loose(far) you want to keep the ending insulator.
At last, we’ll join both ends of the wire using crimp sleeves or a termination knot.
Method 1: Using crimp sleeves
Crimp sleeves are used to join all types of fence wires. Buy heavy-duty crimp sleeves according to the fence wire’s strength.
Tools required:
- Crimp sleeves
- Crimping tool
Steps:
- Place a 4 ft wire through the insulator’s hole and wrap it around the fence post. Decide how loose/far you want to keep the insulator from the fence post.
- Insert both ends of the wire inside the crimp sleeve from opposite sides.
- Use more than one crimping sleeve to join heavy wires(metal).
- Press the crimp sleeve with a crimping tool.
Tip: For a sturdy joint in hard metal wires, use 2-3 crimp sleeves.
Method 2: Make fence wire termination knot
Tools required:
- Only safety gloves.
Steps:
Take a 4 feet metal wire and pass it through the insulator. Wrap the wire around the fence post.
Place one end of the wire over the other. You’ll see space between the wires and the post. Turn one wire around the other, and pass it through the hole. Pull the wires as much as possible to make the knot tight.
Now, tightly twist the extra wire 3-6 times around the other wire.
At last, terminate the extra wire by rotating the remaining wire in the clockwise or anti-clockwise direction. You can also use a plier to cut off extra wires. How do you terminate a wire fence?
If the fence is installed on wood posts, keep fence wires in place by driving fence staples over the wire holding corner insulators to the post.
Tips:
Use the same or more strong wire than the fence wires to install corner post insulators on fence posts.
If you’ve installed a poly wire fence, you can use a poly wire to install insulators around the post.
Step 3. Terminate the fence wire to the corner insulator:
After installing corner post insulators, we’ll tie the fence wire’s end to the insulator.
Follow the steps:
- Take the fence wire close to the post insulators and terminate the extra wire with pliers after leaving a few feet from the corner post insulator.
- Now pass the fence wire through the hole in the end post insulator.
- Holding the insulator, tighten the fence by pulling its end.
- At last, we’ll tightly knot(tie) the wire’s end back to the fence wire.
- Crimping sleeves and termination knots are professionally used to end or splice fence wires, especially metal ones.
- If using crimp sleeves, slide them over the fence wire’s end before inserting it into the insulator.
Again make a termination knot:
- Insert the fence wire you want to end in the corner post insulator’s hole. Pull the fence wire’s end as much as possible to tighten the strand.
- Place the wire’s end at the top or bottom of the fence wire.
- You’ll see space between the wires and the insulator. Turn(wind) the smaller wire around the fence wire for once and pass it through the hole/space.
- Pull the wire’s end as much as possible to tighten the knot. Tightly twist the extra wire around the fence wire 5-6 times.
- At last, terminate the extra wire using a plier or rotate the excess wire in the clockwise or anti-clockwise direction(not around the fence).
In this way, the electric fence has ended/terminated.
Understand series vs. parallel fence ending:
Electric fence wires are installed in series or parallel circuit wiring. So, ending an electric fence depends on how you’ve installed electric fence wiring.
- How to end series fence wiring?
In series fence wiring, we install fence wires in one strand(row), continue to the second with the same wire, and then the third. So you only have to terminate the fence at the very start and end of the fence wiring.
- How to end parallel fence wiring?
In parallel wiring, all fence strands(wires) are separately installed and then interconnected at multiple points. So we’ll terminate all the fence strands separately.
How to install an electric fence gate?
Electric fence gates are installed between two corner posts to provide a path for animal/human entrance. Avoid placing gates in the middle of a fence.
There are different types of gates you can install in your fence. i.e., electric fence handle gates or non-electrified metal gates. First, terminate the fence wires at both fence posts.
1: Install electric fence handle gate
Electric fence gate handles are made of a metal conductor hook with a plastic handle, used as temporary fence gates. Buy sturdy gate materials, i.e., hinges, handles, and post insulators.
Installation Steps:
- First, terminate the fence wires at both posts using end post insulators. If you have installed wood posts, use electric fence gate insulators with two hooks to terminate the fence wire and hang the gate handle.
- Now install corner insulators on a post. Tie the end of the gate handle’s wire to the insulator.
- At last, hang the gate handle’s hook to the live wire(termination knot) at other post.
- Ensure that when you hang the gate handles, their wires are tight and don’t touch each other.
- At last, for better current conductivity in the whole fence, connect live fence wires at both posts with a highly insulated wire and bury it underground to prevent entangling.
If you want to use your desired wire with gate handles, tightly knot one end to the hole on the fence gate handle. Then tightly knot the other end of the wire to the post insulator.
How does an electric fence gate handle work?
Current will pass through the live fence wires to the gate handle and the whole wire. The other end of the gate handle’s wire is non-electrified and tied to the post insulator.
So when we remove/lift the gate handle from live wires, the electric fence gate handle will become non-electrified.
Tips:
- Install gate handles equal to the number of strands and at the same height.
2: Install non-electrified metal gates:
If installing a nonelectrified metal gate between the electric fence, bury an insulated wire under it and connect it to the live fence wires at both posts to convey the electrical connection in the entire fence.
Steps:
- Dig a trench across the gate, at least 12 inches deep.
- Then place a heavy, three-quarter-inch poly water pipe in the trench, leaving at least one foot extending above the ground on each end.
- Use the same gauge as the fence wire, but it must be highly insulated.
- Connect the underground wire to the lowest live fence wire using crimping sleeves. So place a few extra crimp sleeves while ending fence wires.
- At last, fill the trench with soil. Make sure that the fence gate is not shorted with the fence wires.
Frequently Asked Questions
- Does an electric fence have to make a complete loop?
Obviously, all circuits, including the electric fences, require a complete circuit(live-ground). However, the electric fence circuit is designed to remain incomplete until someone touches the fence and the circuit completes.
Current passes from fence wires to earth via the human body. Due to moisture in the soil, charges travel toward ground rods and reach back to the energizer, completing the circuit.
However, the fence wires(strands) can be installed in a loop or an open structure.
- Can electric fences touch wood posts?
Although wood is not a conductor, a little current may leak due to moisture. Ideally, electric fence wires should not touch anything. That’s why fence post insulators are installed to keep fence wires from touching anything.
How does an electric fence works?
Like all circuits, an electric fence circuit must be in a complete loop (live-ground). However, the circuit will remain incomplete until someone touches the fence.
Live fence wires are kept insulated from the ground, so the circuit will be incomplete. When someone touches the fence, their body completes the circuit.
Current passes through the human/animal body to the earth, delivering electric shocks.
In the soil, charges travel toward the grounding rods and return to the energizer, completing the circuit.
Conclusion:
The most crucial step while ending an electric fence is selecting the suitable insulator according to the fence post and wires strength.
The second most crucial step is securely terminating the electric fence wires at the corner insulators using crimping sleeves or making a knot.
If you want to ask anything about ending electric fences, ask us in the comments below.
Related Guides:
I started my wires on a posts with insulated hose, when I come back all the way around the pasture to where I started , do I connect the wires to where I started or wrap them on the same post with insulators?
You can either connect the end of fence wire to the start of wire, or simply terminate it to a corner post insulator at the same post.
Fence strands don’t need to be installed in a complete loop(circle/cycle). Both methods works fine & current stays in the fence wires.