T-posts & U-posts are types of removable metal posts that don’t need to be installed by digging post holes & setting in concrete bases. They get directly driven into the ground. Both types of posts are used for installing various types of fences & have their unique benefits depending on your requirements & installation conditions.
In this detailed guide, we’ve reviewed T-posts & U-posts keeping all the factors i.e. shape, area of use, strength, available sizes & cost, to help you make an informed decision in buying the right post types for your fencing conditions.
Difference between T-Post and U-Post:
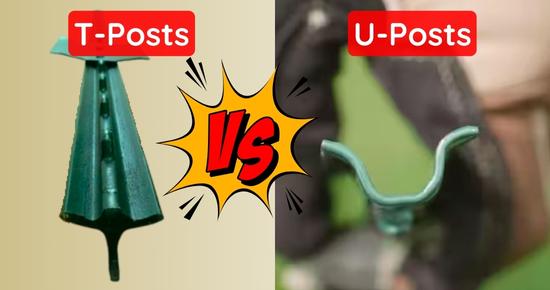
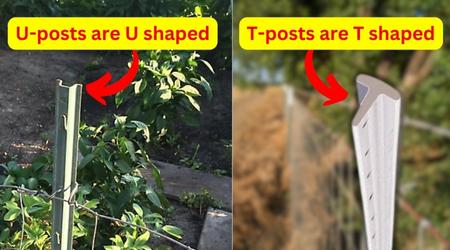
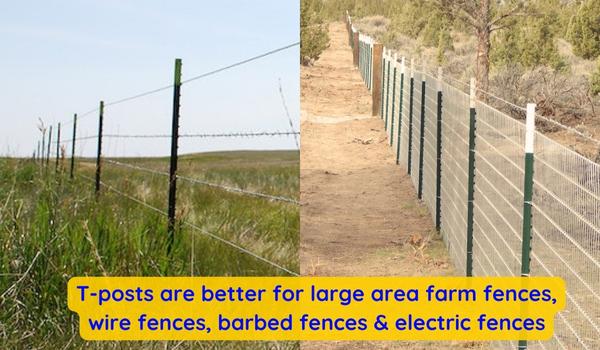
Basic difference between T-posts & U-posts is their shape. T-posts are T-shaped while U-posts are U-shaped. Besides their shape, the main difference is their strength and use in specific conditions. T-posts are made of high-carbon steel (rail steel) to bear more weight & tension. They are better to cover large areas & installing fences having greater weight such as welded wire fence, cattle panel fences, barbed wire fence, electric fence or non-electric strand fences on larger areas. While U-posts are made of regular low-carbon(soft) steel. Hence they are useful for light-duty fences such as garden fences, chicken fences, or temporary livestock fences i.e. grazing fields. Also, there is a slight difference in their prices too.
For heavy-duty purposes, heightened fences & relatively large area coverage T-posts are better than U-posts. While for lightweight fencing & short area coverage & for ease of installation U-posts are also helpful.
Remember: As the material gauge(thickness), weight per foot, & width increase the posts get heavier & stronger. For example, a 13 gauge 3-inch wide & .8lb per foot U-post will be stronger than a 14 gauge, 2-inch wide & .5 lb per foot post.
Below we’ve compared all the characteristics of T-posts & U-posts in detail:
1: Shape
The main difference between T-posts and U-posts is their shape. As suggested by the name T-posts also known as Y-posts or star posts are made by forging & welding two pieces of metal perpendicularly in the shape of the alphabet T.
While U-posts also known as U-channel posts are usually made of 13-14 gauge steel molded in a U shape.
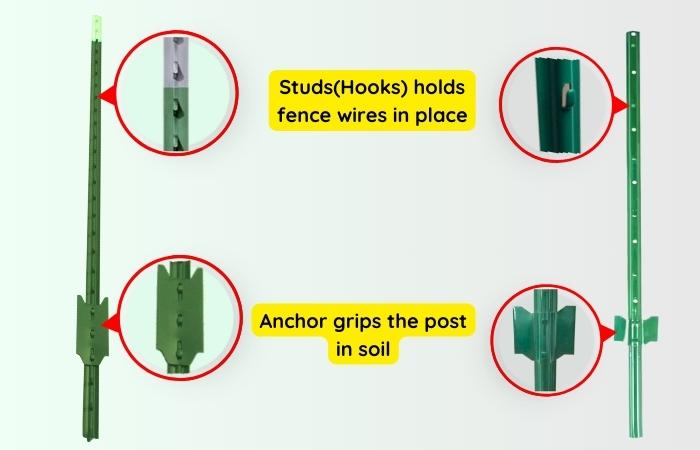
2: Structure & function of each part:
T-posts & U-posts have the same parts that functions the same. The main functional part is the studs(hooks) that help to attach fences & hold them in place. The other main functional part is the anchor at the bottom that grips the post in the soil.
Studs:
Both U-posts & T-posts have studs (hooks) at regular intervals to hook(hold) different types of fencing materials such as wire fences, metal wires, post clips, zip ties & electric fence insulators in place.
U-post studs can be bent to hold(catch) wire fences without needing extra stuff. U-posts also offer holes for putting up signs and tying plants.
Anchor:
There is an anchor(hook) at the bottom of both U-posts & T-posts, that grips(secure) them in the ground & offers stability.
3: Types of fences that can be installed:
Due to the difference in strength, T-posts and U-posts are used in different fencing scenarios. With T-posts, you can install(attach) any type of lightweight to heavy-duty wire fences (mesh), electric fences, and high-tensile stranded metal wire fences, either on smaller or larger areas. However, wood panel fences with T-posts should be installed only in short areas as the wood panels are quite havier.
However, U-posts support short & lightweight wire fences & electric fences only for small area coverage, such as in gardens or homes.
4: Material and Strength:
T-posts are usually made of thicker high-carbon steel(heat-treated) or rail steel. They are primarily used in medium to heavy-duty fencing requirements, such as large-area agricultural and livestock fencing, where superior strength is required.
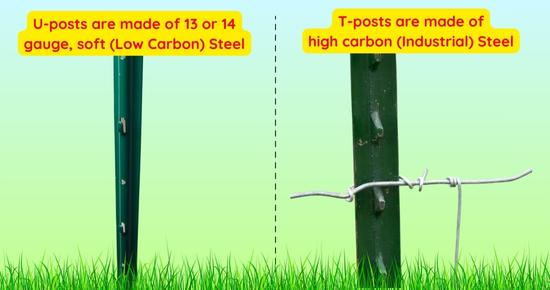
While U-posts are made of 13 or 14-gauge regular low-carbon steel(soft) forged into a U shape. Due to their less load-bearing capacity & flexibility, they are less likely to bear wear & tear in hard ground conditions and hence are more prone to bending. That’s why U-posts are only suitable for lighter-duty fencing needs like garden fencing, temporary animal fencing, barriers & and hanging signage where tension & strength requirements are not as high.
Pro Tip: The strength of T-posts & U-posts can be judged by their weight per foot & width. The greater the weight per foot & width, the post will be heavier & stronger & the cost will also increase accordingly.
5: Available Sizes(Dimensions):
T-posts are available in 5ft, 6ft, 7ft, 8ft, 9ft, 10ft, & 12ft lengths. Common widths of T-post’s are 1-⅓ in(1.3-in), 1-½ in(1.5-in) & 1-¾ in(1.75-in).
While U-posts are available in 3-7 ft lengths. They come in various widths 1-in, 1.2-in, 2.2-in, 3-in & 3.5 inches.
Note: U fence posts are not available more than 7ft in height. In extended lengths of 8ft, 9ft, 10ft & 12ft U-channel sign posts are available that are mainly used for hanging warning signs. There are no studs/hooks on U channel sign posts, hence it’s difficult to hook the fence & are not recommended for fencing.
6: Weights per Foot:
Per foot, weight of a post describes how strong it is, capable of bearing load & wear & tear. As the weight per foot increases, posts get heavier & sturdier.
T-posts:
Due to the greater strength requirements, T-posts are generally categorized more by their weight per foot of total length.
T-posts are commonly available in these weights per foot:
- 0.85lb per foot (light-duty)
- 0.95 lb per foot (light-duty)
- 1.15lb per foot (average, mostly provided by Chinese companies)
- 1.25lb per foot (heavy-duty, commonly available & used)
- 1.33lb per foot (heavy-duty)
- 1.5 lb per foot (top quality, rarely found in online stores & available in bulk)
U-posts:
U-posts are usually made of 13-14 gauge steel. They usually weigh .5lb per foot to a maximum of 1lb per foot, that’s why not as strong as T-posts. That’s why they are sued for lightweight fences.
7: Cost
T-posts & U-posts costs almost the same. Although T-posts are heavier & sturdier than U-posts & used for heavy-duty tasks still they are cheap or almost equal price as U-posts. Which makes T-posts a superior choice for fencing.
Let’s compare the prices of different lengths of T-posts & U-posts.
- Light duty to heavy duty 5 ft T-posts in various widths are available for 3-8 $ per piece. While 5ft U-post in different thicknesses cost around 6-10 $.
- If we talk about 6′ T-post, 1.25lb per foot posts cost around 5$ – 8$. 1.33lb per foot costs around 5-10$. On the other hand, a 6ft U-post can cost around 7-15$ depending on the material gauge, width & weight of the post per foot.
- 7ft T-post costs around 7-11$ per piece while 7ft U-post costs 10-16$ per piece.
Keep in mind: 1.5 lb per foot T-posts are usually available in pallets (bundles) & are rarely available online.
Tips for saving budget:
- Price can vary depending on the brand or shipping time if you are buying online.
- The price of posts decreases if you buy products in packs of 10 or in bulk.
- Before making a purchase check various posts of your desired length offered by different stores or brands. Compare their prices & check for customer reviews & opt for the one with the most positive feedback & average cost as per specifications.
- You can save money by shopping at local stores instead of online, especially if you need products in bulk. You might get posts in cheap or even better quality for the same price at home improvement or gardening supplies nearby.
Pros and Cons of T-posts & U-posts:
Depending on the requirements T-posts & U-posts can have their unique benefits. T-posts are strong and durable, suitable for heavy-duty tasks but may cost more, while U-posts are slightly budget-friendly and lighter suitable for lighter-duty applications but may need frequent replacement.
Below we’ll analyze the benefits & drawbacks of T-posts & U-posts in detail:
Benefits of T-posts:
- Sturdy, heavier & bear more tension(stretchable) than U-posts.
- More suitable for heightened fences, covering large areas & heavy-duty purposes (to withstand heavy pressure/tension) such as agricultural fences.
- Usually made of rail steel(high carbon/toughened steel) that is multiple times stronger than normal steel thus is ideal for heavy-duty fencing & long-lasting results.
- Ideal for any type of ground conditions.
- Easy to install & remove.
- Due to the broader use of T-posts in heavy-duty & large fencing projects, plenty of supportive products are available to attach them to different fencing materials. For example: T-post hinges attach gates to T-posts. T-posts to wood fence brackets attach wood panels to T-posts, T-posts to cattle panel connectors, a variety of electric fence insulators, fire range target hangers, & much more.
- Costs are almost the same & could be more affordable than U-posts in terms of long-lasting results. Especially when bought in bulk, from a manufacturing company or local home improvement hardware stores.
Drawback of T-posts:
- High-quality products don’t have any particular drawback except for slightly tough installation in hard ground conditions.
Benefits of U-posts:
- Useful for light-duty, temporary, short-heightened & small area fencing such as garden fences & to support plants or hang warning signs.
- Useful on soft ground.
- Lightweight, easy to install & remove.
Drawbacks of U-posts:
- Not helpful for heightened, heavy-duty & large-area fences such as agricultural(animal) fences.
- Made of fragile metal & half-weighed than T-posts, thus bends in hard/rocky ground conditions.
- Pricier for their strength & durability as compared to T-posts.
My personal experience & recommendation:
As a fence installer & agricultural researcher, I’ve experienced T-posts being more robust for installing heavy-weight wire fences such as thick gauge welded wire fences, cattle panels, or highly tensioned metal wire or barbed wire fences. They are better for large-area fencing, i.e. agricultural or animal fencing. The reason is they are made of toughened steel(high carbon) & their sharp-edged body gets driven even in the hard ground & firmly grip the soil.
U-posts on the other hand are helpful in installing lightweight to medium weight fences but in smaller areas where minimum load & tension are expected. For example: for installing garden fences, chicken fences & temporary animal fences(portable grazing fields).
It’s because they are made of regular soft steel, that’s unable to bear excessive tension. They are suitable for soft ground conditions & may bend while installed on hard rocky ground. Also, their U-shaped hollow body doesn’t grip well in the soil & increased load can result in fence posts to lean or bend.
Keep in mind: Although T-posts are sturdier, you should incorporate wood posts between them or at least at the corners, especially when covering large areas or installing heavy-weight wire fences & high-tensioned metal wire fences i.e. agri(livestock) fences.
General tips to choose posts according to requirements:
- Think which post will be better according to your conditions. Where you want to install the fence, in a large area such as fields or in a small area like a garden or home. Does the fence have to bear a lot of tension or not? If the ground is soft or hard. Then simply choose T-posts for medium to large area coverage & medium to heavy duty fencing needs & especially for hard ground. While U-posts are helpful for light-duty fencing needs & soft ground i.e. garden fences small animal fences(chicken, duck, or rabbit), or portable grazing fields.
- To calculate the required number of posts for your fence, measure the perimeter (length of the area to be fenced) using a measuring tape or GPS. Then divide the perimeter with the desired(optimum) spacing between your fence posts. As U-posts bear less load than T-posts, they should be spaced a maximum of 6-10 feet. However, T-posts are sturdier & have greater load-bearing capacity. Hence they can be spaced 10-20 feet apart depending on the expected weight of fence & tension created by the kept animals.
- Whether buying T-posts or U-posts, choose posts 3 ft or at least 2 ft feet higher than your fence. It’s because a few feet of the post gets driven into the ground. For sturdy fencing, it’s recommended to drive 1/3rd of the posts into the ground.
- Instead of buying a low-quality product to save money, invest in a high-quality product that can serve you for years, as there is no huge difference in prices.
How to Install T-posts and U-posts?
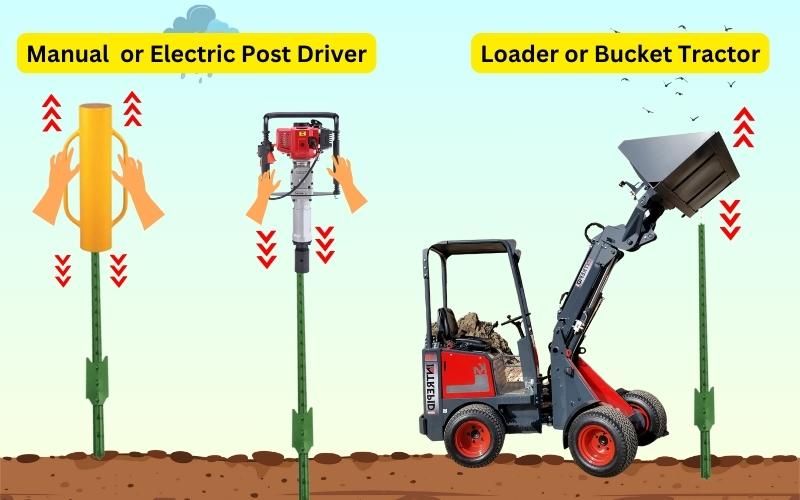
T-posts & U-posts are driven into the ground without digging post holes, that’s why they are also known as no-dig posts. To drive T-posts & U-posts we can use any post-driving tool such as a manual post driver, electric post driver, hydraulic post driver, or a tractor or loader with a bucket tractor or loader.
Tools to drive(install) T-posts & U-posts:
- To install T-posts & U-posts the same post-driving tools are used. As U-posts get installed in soft to mild hard ground the process is not that hard, so a manual post driver(ideal) or a rubber mallet is efficient for this purpose.
- While T-posts being heavy-duty are installed on all types of ground conditions. To install a few T-posts you can use a manual post driver or a similar heavy pipe closed from an end such as a cast iron pipe.
- For installing a larger number of T-posts, especially on hard ground conditions, you can use an electric/gas-powered post driver, a hydraulic post driver, or a tractor/loader equipped with a bucket.
Basic tips to install T-posts & U-posts correctly:
- Make sure to keep all the posts facing the same direction.
- As the fence gets attached to the studded side of the posts. If you intend to keep your animals inside the fence, install all the fence posts with studs facing toward the enclosure. This way the fence will be installed inside the posts & enclosure, preventing animals from accessing & pushing against the fence posts.
- Similarly, if you are installing fence posts to keep the preying animals outside the enclosure i.e. to keep rabbits away from your garden, install T-posts/U-posts, with studs facing outside the enclosure. Hence the fence will be attached outside the fence posts.
Steps to Install T-posts & U-posts:
- Decide appropriate spacing. T-posts can be spaced 10-20 feet, while U-posts can be spaced a maximum of 8 feet.
- According to the desired spacing, mark spots on the ground. Also, mark the part of the post(⅓ rd) that should be driven into the ground.
- Align the post vertically straight, facing the right direction & the anchor should be toward the ground.
- Then take your post-driving tool & place it over the post & drive it up to the marked height on the posts.
- After driving a few inches, use a level tool to check if the posts are balanced. If they are tilting, push/pull them in the desired direction.
- To hang a gate between the fence, install the gate posts leaving the exact distance(plus a couple of inches for hinges) according to the length of the gate.
Pro Tip: In soft ground, after driving posts pound the soil all around using a hand compactor. It’ll compress the soil layers making the posts firmly anchored in the ground.
T-posts and U-posts can be removed & reused:
T-posts & U-posts can be removed & reused as they are driven into the soil instead of setting in concrete. U-posts being installed in soft ground(temporarily) can be pulled with hands. However, you can also use specially designed post-removal tools such as a T-post puller, a farm jack(hi-lift jack), or a car jack.
T-post puller’s c-shaped face locks with the post’s studs & then leverage is applied through the handle & the post is pulled out of the ground.
If using a car or a farm jack you’ll need another tool that gets fastened to the posts such as a t-post puller plate, a chain, a pipe wrench or anything else. The jack is used to lift that tool up & ultimately the posts get out of the ground.
Installing different types of fences with T-posts or U-posts:
As discussed above you can install most types of fences with T-posts & U-posts. First, you’ve to install 1/3rd of T-posts or U-posts at regular intervals using post-driving tools. Then the fence installation & required tools depend on the type of fence you want to install.
How to install wire fences with T-posts or U-posts?
You can install any type of light or heavy-weight wire fence with T-posts. However, for heavy fences & large area coverage, use heavy-duty T-posts, must drive 1/3rd of them & incorporate wood posts in between for greater stability.
With U-posts, it’s recommended to only install lightweight wire fences such as chicken wire. However medium-weight fences i.e. welded wires can also be installed with U-posts, but only for small area coverage & where no heavy tensin/load is expected.
Required Tools:
- The required length of the fence
- Fence cutter
- Tying material (Fence clips, zip ties, or metal wire pieces)
- Fence puller (for longer fences)
Steps to Install wire fences with T-posts or U-posts:
- After installing posts, start from a corner post & vertically align the fence on the side of the studs.
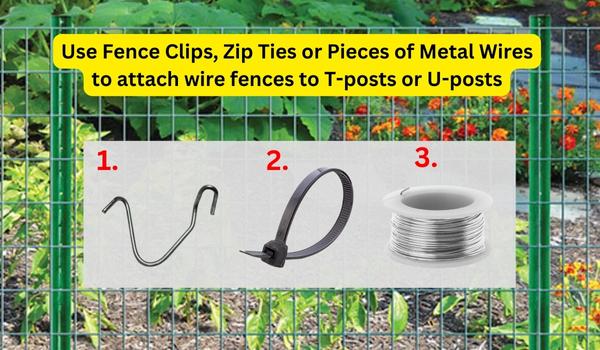
- Starting from the top of the post, use fence clips, zip ties, or pieces of metal wires to attach the wire fence to the T-posts or U-posts at regular intervals(1 foot).
- Keep the fence stretched toward the bottom & make sure it’s touching the ground. Use at least 3 clips/zip ties or pieces of metal wires on each post.
- If installing a chicken wire fence wrap it around the starting post & then secure it in place using zip ties or pieces of metal wire.
- Now head toward the next post & stretch the fence horizontally. Don’t overstretch the wire fence as it may result in the breakage of wires & exert extra tension on the fence posts. Use attachment tools(post clips or zip ties) at regular intervals starting from the top toward the bottom. In this way attach the fence to all the posts.
- T-posts also make gate installation easier with the use of T-post hinges eliminating the need to install wood or heavy-duty posts for gates. Hinges are installed(mounted) over the T-post at a height according to the gate hinges. Then the gate hinges & T-post hinges are hooked to each other. , without requiring any.
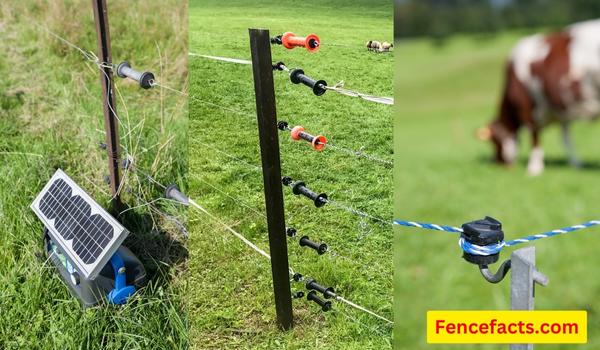
How to install an electric fence with T-posts or U-posts:
As T-posts & U-posts are made of metal, the greatest risk of installing electric fences is the higher chance of short circuits that can result in power loss & an ineffective electric fence.
That’s why metal posts are used to install temporary or short area electric fencing so any sort of fault can be easily inspected & fixed. Large area electric fencing with T-posts or U-posts makes it quite difficult to find the point of fault(short-circuit).
Step 1: Gather the materials:
- To install electric fences on T-posts & U-posts you’ll need T-post insulators or U-post insulators. Post insulators are available according to the shape of the post, in different designs & extended lengths to make electric fence installation easier on metal posts. It’s better to choose sturdy extended post insulators that can keep the fence wires at least 2 inches away from the posts.
- Also, opt for a high tensile & good conductive wire to keep the fence stretched & prevent short circuits.
- For per output joule of your energizer use 3 feet of the rods & each rod must be 6-8 feet long.
- To set an electric fence charger, highly conductive(think) insulated wires should be used.
Step 2: Decide the number of strands & spacing:
Decide the number of strands(rows) according to your safety requirements. For example, to contain cattle you’ll need 3 strands of electric fence wires installed at 2 feet distance.
Step 3: Install insulators on T-posts or U-posts:
Install insulators on T-posts/U-posts equal to the number of strands at the desired & same height on all posts. Start from a corner post & use corner post insulators to terminate(tie off) the fence wire as they can bear greater load & tension of wires.
Tip: For large area fencing, it’s better to use wood posts at corners or if using metal posts drive them as much as possible.
Step 4: Decide wiring Pattern (Series/Parallel)
After terminating the electric fence wire at the starting post, hook the wire to all the post insulators on the centered posts. Opt for a single wire pattern(series wiring) if installing an electric fence over a shorter area. As it’s an easier way of wiring & there is no need for multiple connections in short areas.
While for large rea fencing terminate all the fence strands separately & interconnect at multiple points to improve the current flow.
Step 5: Install ground rods:
Starting within 10-20 feet of your energizer’s range install 3 ground rods(at least) at 10 feet intervals. Interconnect the ground rods using high-quality insulated wire.
Step 6: Setup the fence charger:
At last use a highly conductive insulated wire to attach the energizer’s live terminal to the start of the fence wires & the ground terminal to the nearest ground rod. Hang the energizer under a shade & at a height away from the animal’s reach.
Step 7: Test the electric fence:
Before turning up the electric fence energizer make sure there is no element shortcir cuiting the fence wires. At last use a voltage tester or a specific electric fence tester to check the voltage in your electric fence.
Check your energizer’s optimum voltage range & compare it with the tester’s reading. Usually, electric fences generate 5000 V+ (5KV).
Conclusion
T-posts & U-posts are both useful products for gardening, agricultural fences & similar purposes but in slightly different scenarios. I would suggest you don’t compromise on the quality & make a one-time investment in heavy-duty T-posts for long-lasting results as there is not such a huge difference in pricing. Also, T-poss supports most types of fences. They can bear more load & tension as compared to U-posts, hence ideal for heavy-duty tasks & long-range fencing.
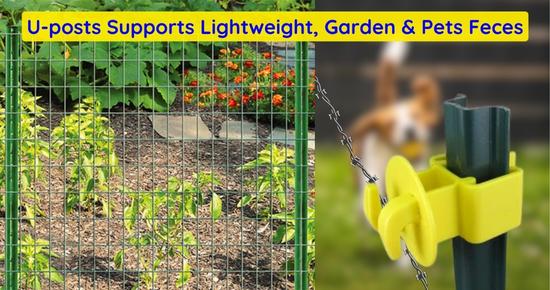
While U-posts are easy to install & helpful for installing lightweight or short area fencing such as garden fences, chicken fences & pets fences.
If you still need guidance, ask us in the comments below.
I’m not sure where you’re getting your information, but good topic.
Thank you. Let us know whenever you need our assistance.
Hey people!!!!!
Good mood and good luck to everyone!!!!!